Error has occurred!
- KB277
- Apr 24, 2024 08:50 AM
How do I create and use dynamic stamps in PDF-XChange Editor?
Question:
How do I create dynamic stamps in PDF-XChange Editor Plus?
Answer:
There are two methods to create a dynamic stamp, the "simple" process uses our Stamp creation helper tool, while the Manual process is more involved, but gives you direct control over the actions instead of being limited to a handful of presets.
Note that the “Stamp Helper” can only create new stamps, while the manual process should be used for any “Editing” that needs to occur, including to add or modify dynamic content to stamps which were previously created with either method.
Click either header below to learn more about each option.
Stamp Helper (Free feature)
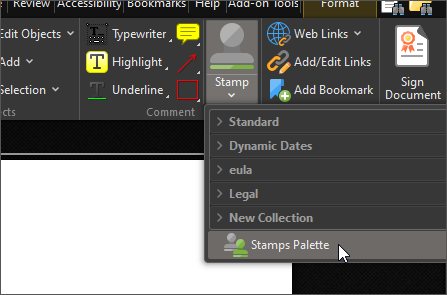
As of Build 10.0.0.370, we now have a "stamp creation helper" tool, which can be accessed through the stamps palette.
1. To start, we will open the stamps palette:
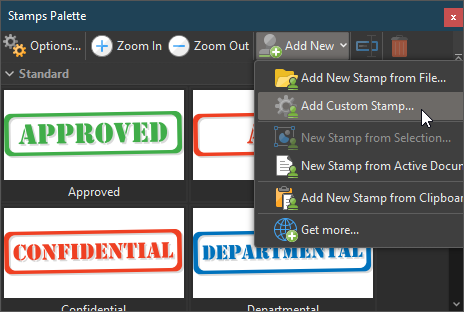
2. Once you have this open Proceed to click "Add new > Add Custom Stamp..."
3. Then use the "text" tool to place the static text you wish to enter (in the example, I have preconfigured the properties of the text as needed, and resize the field so it can fit the form field later, you can customize your stamp as you like):
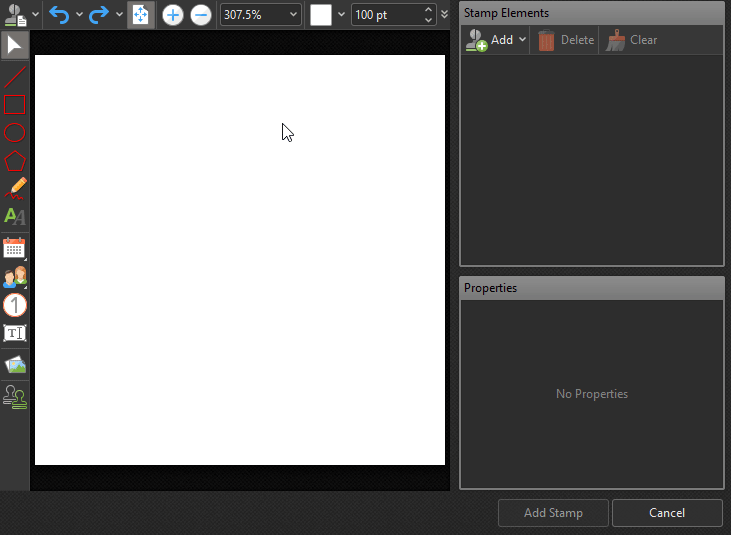
4. After this, choose the "Date Field" tool, and place it in the stamp as desired. Note also that you can "Right click" on the tool icon before placing a field to choose the date format you wish to use. If your desired date format is not available, please see the next section of this article for more robust customization.

5. Finally, click "add stamp" and you will find this new stamp is added to the collection of your choice, for quick use!
Manual process (More robust - Requires license)
Please note that it is necessary to have PDF-XChange Editor Plus or PDF-XChange PRO in order to carry out the operation detailed below, as forms editing functionality is required.
JavaScript can be used to add dynamic elements to stamps in PDF-XChange Editor Plus, but there are a few steps to consider prior to adding JavaScript, or form fields. This article assumes some basic knowledge of Javascript and its uses, if you are not comfortable with JavaScript to some extent, please ask a colleague who is for assistance.
You will first need to create the visual aspects of what will become your stamp. This can be an existing image or PDF. You will find general instructions on creating basic stamps here.
Note: This Article REQUIRES that you already have a static stamp created. You cannot directly create a dynamic stamp without first following the steps in the article linked above.
1. In this example, we have created a new PDF, and added a Rectangle and some static text (with the Typewriter):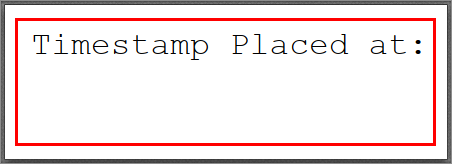
2. With that PDF document open, go to the stamps pallet, and choose Add New Stamp from active document:
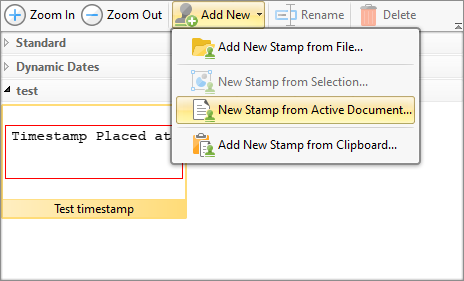
3. Give it a name suited for the stamp you are creating. You should see the new stamp in your collection once saved (as above).
**Note: You cannot add stamps to the "Dynamic dates" collection, as that is a locked collection. If you still see this collection as an option, you are using an older build of the software and it is recommended that you update.
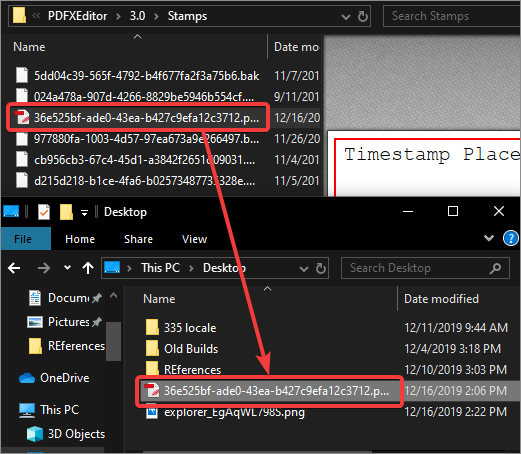
4. Open two Windows Explorer windows side by side. In one, navigate to %Appdata%\Tracker Software\PDFXEditor\3.0\Stamps. In the other, navigate to any folder in your system to use as a intermediary location. The Desktop is to be used in this example.
5. Locate, but do not open, the specially formatted Stamp Collection file containing your new stamp in %Appdata%\Tracker Software\PDFXEditor\3.0\Stamps (we recommend enabling the preview window so that you can locate the correct document):
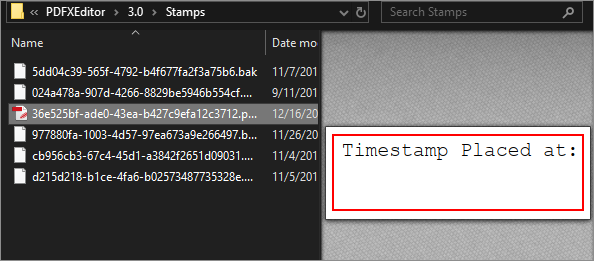
6. Move that specially formatted Stamp Collection file to your Desktop.
7. Open the stamp collection file you just moved to your desktop. It should be opened in the PDF-XChange Editor.
8. Add Form fields (usually text fields) that will contain the dynamic elements of your soon-to-be dynamic stamp.
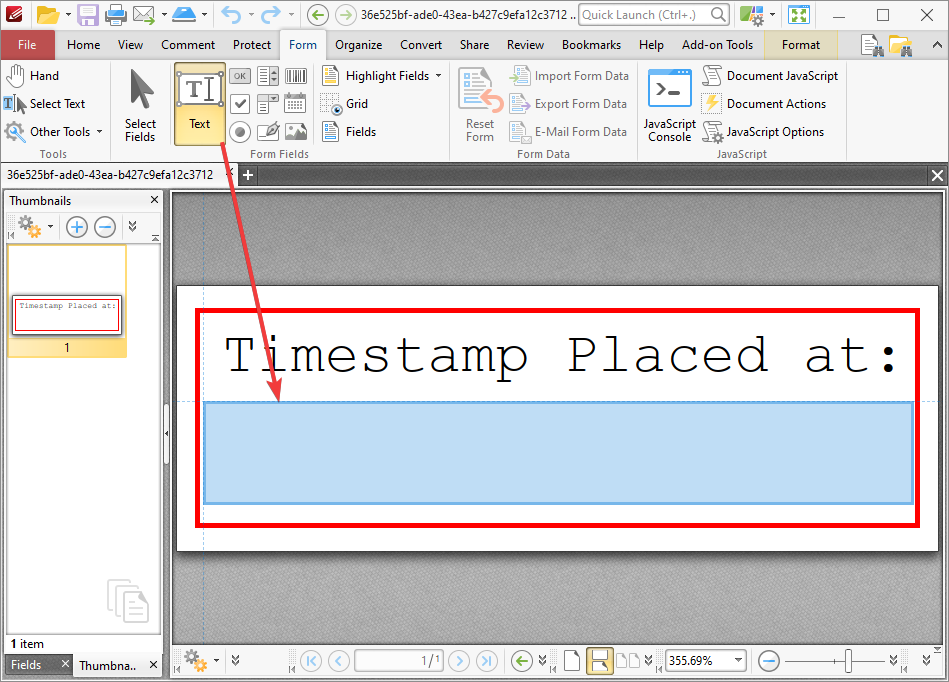
9. Add the desired Javascript to your form field to make it dynamic.
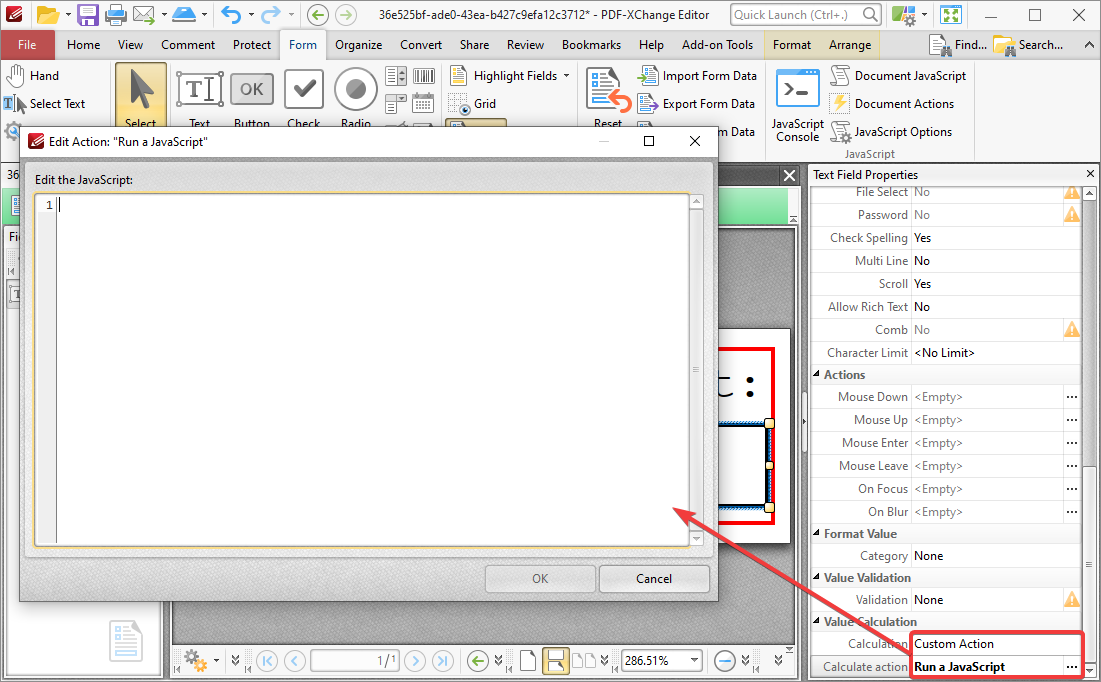
For example, the JavaScript below will automatically place the date and time at which the stamp was placed when included in the Value Calculation/Run a JavaScript property of that form field:
var d = new Date;
event.value = util.printd("yyyy/mm/dd/ HH:MM:ss", d);
Open the properties pane (Ctrl+`) then locate Value Calculation > custom action. Click on the Ellipsis [...] next to Run a JavaScript in order to activate the Edit Action: "Run a JavaScript" dialog, and enter the desired JavaScript:
**Note: When a dynamic stamp is placed, it becomes a flat comment on that PDF. The values of any given form field must auto-evaluate as the stamp is placed. In the JavaScript example above, the date cannot be changed once the stamp is placed as expected. Find more information regarding working with PDF's and JavaScript in the Acrobat JavaScript API documentation.
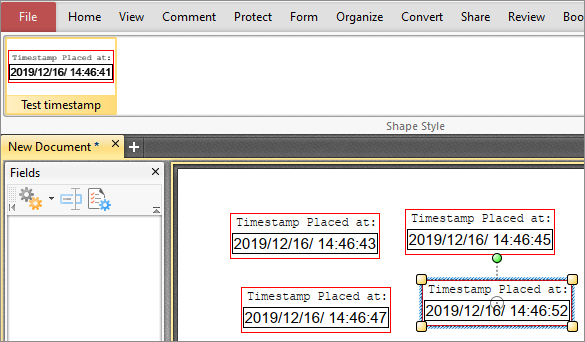
10. As shown below, the JavaScript adds the date and time to the text field. This will be shown immediately once the JavaScript is added to the form field's Value Calculation/Run a JavaScript property:

11. This step is usually where a mistake will be made, if any. Please save the file to its current location - DO NOT rename it.
12. Close the PDF-XChange Editor.
13. Move the stamp collection file back into %appdata%\Tracker Software\PDFXEditor\3.0\StampsYou can now reopen the Editor and should see your dynamic stamp present and functioning correctly in the stamp collection selected earlier.
Now, as shown below, the stamp auto evaluates the date and time when placed:
More Like This
- KB#456: How Do I Customize toolbars in PDF-XChange Editor?
- KB#282: Why won't the "Send by E-mail" feature work in conjunction with Microsoft Outlook?
- KB#447: How do I determine what version I should install/how can I retrieve my serial key?
- KB#338: What are the MSI installation switch options for the PDF-XChange family of products?
- KB#195: What is the difference between Place Signature, Sign Document and Certify in PDF?